How to integrate
Start by reaching out to our sales team and get a contract signed and initial prices agreed. Once these steps are out of the way the implementation can start.
The Getting started guide provides a high-level overview of what Cloudprinter.com is, how the cooperation between your us will work. It is a good place to start.
Choose the method of integration
Direct integration
Cloudprinter.com offers a predefined, structure and easy to adopt API solution for print partners to integrate.
The print partner implements an HTTP endpoint to receive the order JSON/XML information. The endpoint is like a webpage that can receive and parse the order data. Development work is in most cases required.
Signals back to Cloudprinter.com with status updates is required. The print partner is required to implement a webhooks solution that can post JSON signals from the print partners system to an endpoint at the Cloudprinter.com system. Retry mechanisms are required.
Partner integration
Are you using Enfocus Switch in your production workflow we recommend to use the Cloudprinter.com switch integration, it removes most of the integration work by providing a set of apps to drag into your flow in the flow designer. Read more about Enfocus Switch here
Basic configuration
A few basic configurations in the admin dashboard are required, and why not just get it done right away.
- Setup production capabilities - Check of the paper types, binding methods, finishings you support. Also, check of the productions machines you have.
- Select the shipping options you support and set shipping pricing for the countries where you offer to ship to. After selecting the shipping services, download the CSV template and set the shipping prices. Finish up by uploading the CSV to the system and the prices get imported.
Receiving orders
Orders are processed by the Cloudprinter.com system and prepared for your production in either JSON or XML format.
Production Interface
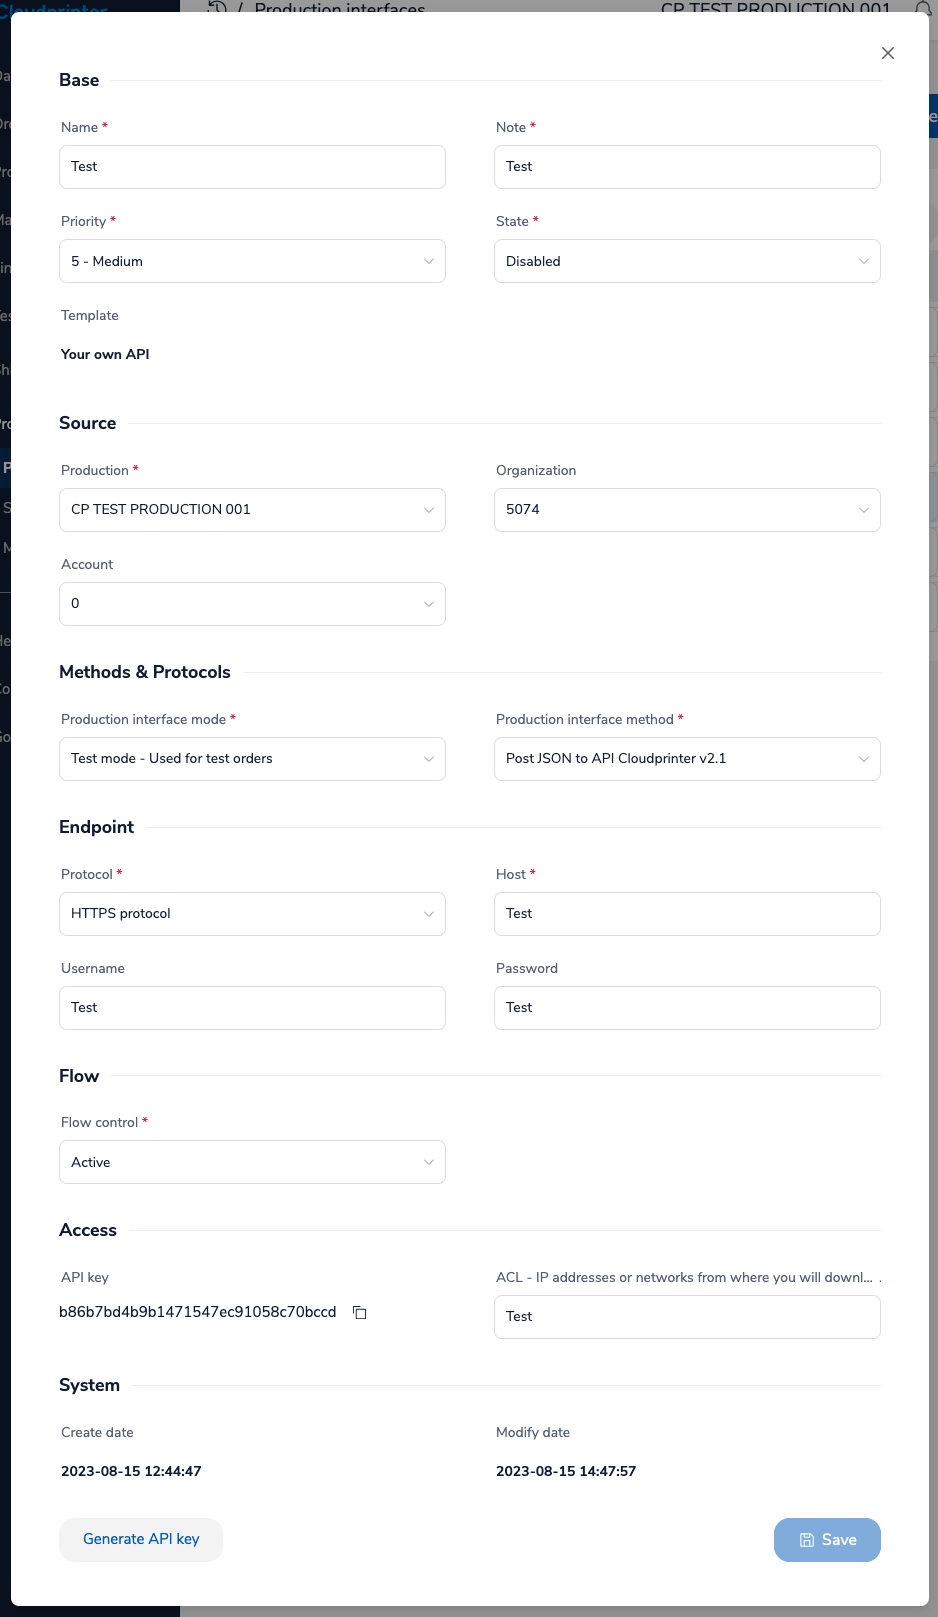
For the Cloudprinter.com system to know where to post the orders and in which format, you have to set up a "Production Interface". It is found in the Cloudprinter.com admin dashboard.
On the "Production Interface", you select the method to use for the communication between Cloudprinter.com and your new endpoint. You also set up the URL for the endpoint as well as authentication.
Here is how it looks:

Your endpoint
The Cloudprinter.com system posts the order to a RESTfull endpoint that you provide. It is a simple HTTP post request to your publicly available web server. The request contains the order data structure in either JSON or XML.
Your endpoint validates the request, parse the content and imports the order to your system. If the order validated an HTTP status 200 is returned, otherwise an HTTP status 400.
Once the Cloudprinter.com system sees an HTTP status 200, it is expected that the delivery of the order data was successful.
The documentation for the two formats are found here:
Sending signals
While you are producing the orders we need signals to follow the process and to inform our customers. Signals are small JSON messages posted by your system back to Cloudprinter.com. More information here: CloudSignal API
CloudSignal Interface
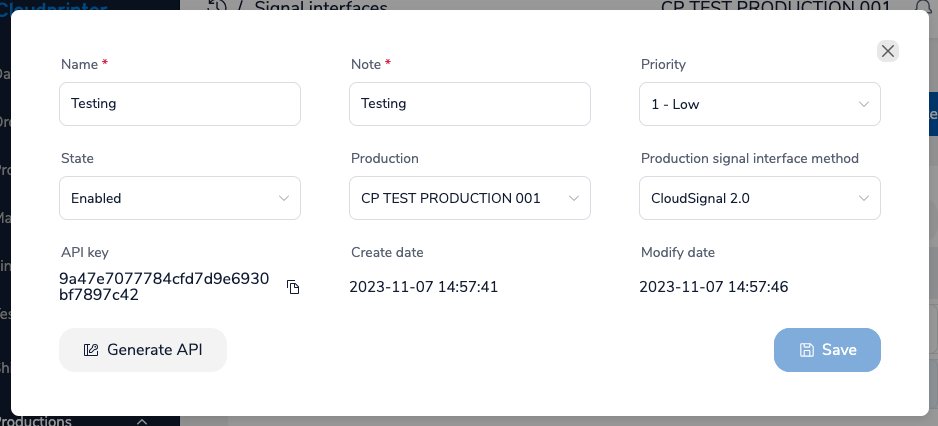
The signals back to Cloudprinter.com are small JSON structures, which are posted to a "CloudCore API Interface". The "CloudCore API Interface" is set up in the Cloudprinter.com admin dashboard.
The version of the protocol used is configured and an API key is generated on the "CloudSignal API Interface". The API key is used for validation of incoming signals.
The configuration page looks like this:

Your signal sender service
Signals are triggered by events ion the production flow, and we expect signals to be posted to Cloudprinter.com shortly after the event occurred.
All signals are item based. An order can have multiple items, and signals must be sent for each item in the order.
It is your responsibility that the signals are delivered, and a retry mechanism is required to handle situations where the first delivery attempt fails. Multiple attempts must be made and with a fair time in between. Signals that are not delivered to Cloudprinter.com timely counts negative on your performance score.
We recommend to save the signals in a database and have a signal sender service handling the sending and retry.
The basic signals are:
- ItemRegistered - When you have imported the order data to your system with success. Download of order PDF files is normally after this signals. The time limit on the signals is 15 minutes after receiving the order data on the endpoint.
- ItemShipped - The shipped signal provides the tracking number and shipping option used. The signal is sent when the tracking code is assigned or when an end of day procedure is run.
- ItemError - Indication of an error that you can recover from in production. This could be a book block that needs to be reprinted. A delay and a custom error text are required.
- ItemCanceled - Indication that you could not produce an item and had to cancel it. If there are other items in the order, these items must still be produced and shipped.
Processing the order
Now that you have the order data in your system, you can start the processing of the order. Here is a quick overview of the tasks.
Download the order files
The order PDFs are available for you to download any time you are ready for it. They are located in a secured area just for your production. If you have issues access the files, then have a look at the ACL configuration on the "Production Interface".
For each PDF file that is needed for the order a size and MD5 sum is included. When you have downloaded the file, you check the size and compare the MD5 sum. In case the size or MD5 sum does not match, download the file again.
Books require two PDF files, one for the book block and one for the cover. All other products only require a single PDF. Each file has a type in the order data so you can easily can what is what.
Producing the order
Producing the items are your core business and we let you do that as you find best. We do though like to get as many signals as possible during the production. This helps us with performance calculations and gives a better service to our customers.
Errors and cancellations
There will be times when something goes wrong and an item have to be produced again and the order gets delayed. In these cases use the "ItemError" signal to inform us about it. More information here: ItemError.
And when a PDF file cannot be processed by the RIP server or the size is completely wrong. Then you have no other choice than to cancel the item. This is done with the "ItemCanceled" signal. More information here: ItemCanceled
Shipping labels
Packages shipped to the end-consumer be recognizable, and for this, it is important to have the client's company name as the consignor name on the shipping label. In the order data, the consignor is included for this purpose. More information here: Generating shipping labels
Reorders
Reorders look just like regular orders, except for a few additional information on the item level. A reference to the original order and item, as well as a predefined reorder cause and custom text description of the cause. More information here: How to handle reorders
Testing the integration
After end integration, a testing period is started. Coudprinter.com provides a number of easy to use test cases for the initial testing. Together with Cloudprinter.com, the final testing is performed. More information here: Testing the integration